Perhaps you’ve heard about the Facebook domain verification but you’re not sure what it means and how to do it. Or maybe you’re not sure if this applies to your business.
No need to worry, we’ll cover the basics and take you through the domain verification process step by step.
Facebook domain verification is a highly recommended step after creating a Facebook Business Manager account. Especially, if you’re planning to use Facebook Pixel and run conversion campaigns.
What is Facebook domain verification and why should I do it?
Simply, domain verification provides a way for you to claim ownership of your domain. According to Facebook’s official resource, domain verification is a step towards ensuring that only verified owners can edit the way their content appears on Facebook. Therefore, it allows you to prevent misuse of your domain and the spread of misinformation.
Besides, if you wish to run conversion campaigns (which you should!) on your Business Manager account, you need to configure web events with Aggregated Event Measurement (AEM). AEM is a recently introduced support measurement after Apple announced its App Tracking Transparency requirement with iOS 14.5 update. To be able to configure web events with AEM, you need to have your domain verified.
So let’s look in close detail on how to complete the Facebook domain verification.
PHASE 1 – Find your way to domains on Facebook Business Manager
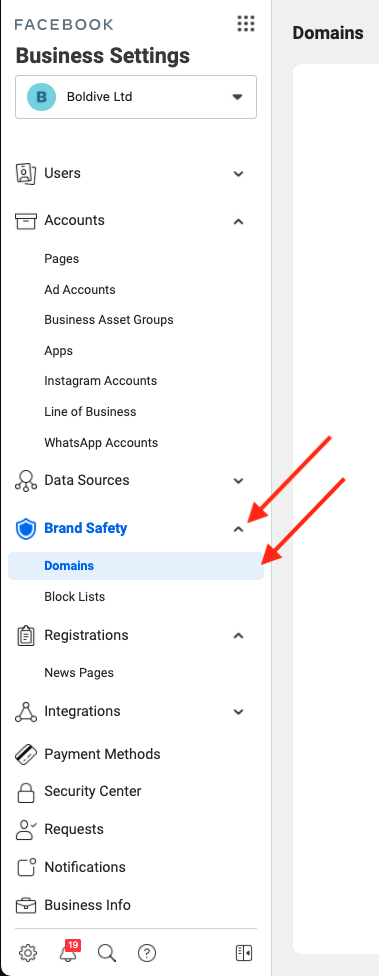
- Log in to your Facebook Business Manager, select your business and go to “Business Settings”.
- Next click on “Brand Safety” and then “Domains”.
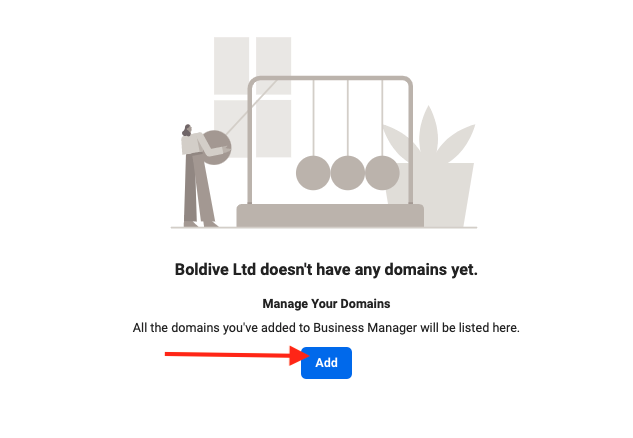
- Most likely you have no domains listed there. So, go ahead and click “Add”.
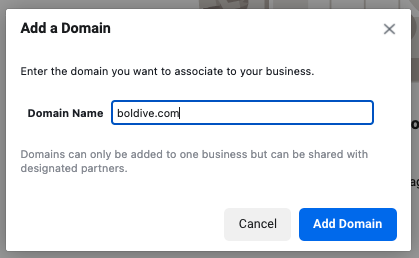
- A small popup will appear where you can type your domain name.
Note: Type the domain name in sitename.com format, that means don’t include “www” or “https://”.
- Now you will see three methods of verifying your domain: meta-tag verification, HTML file upload and DNS verification. Bear in mind you only need to do one of these three methods.

So, let’s have a look at each method in detail.
PHASE 2 – Choose your verification method
#1 Method – Meta-tag Verification
- Copy and paste the HTML code that is visible to you.
- Go to your site content management system, such as WordPress and head to your homepage file. Find <head> section and place it between <head> and </head> tags.
- Open your site’s homepage on Chrome and make a right-click anywhere on the page and choose “Inspect”.
- Using CTRL + F on Windows or Command + F on Mac, search for the HTML code you just placed on your homepage.
- Found the code? Move back to Facebook Business Manager and hit “Verify”.
Note: In most cases, you’ll be able to see success notification immediately. However, it can take up to 72 hours before you see your domain as Verified with a green dot.
#2 Method – HTML File Upload
- Download the HTML verification file from Facebook Business Manager.
- Upload that file to the root directory of your website.
- Go back to Facebook Ad Manager and click “Verify”.
#3 Method – DNS Verification
- Log in to your domain registrar (this could be Domain.com, HostGator, GoDaddy or any other provider) and go to the DNS settings page.
Not sure what a domain registrar is and which one you have? Just visit domain name registration data lookup and you’ll be able to find out. - Add a new DNS record with a type TXT.
- Enter an @ symbol in the hostname field (only if required).
- In the TXT value field you can paste the verification TXT record provided in the Facebook Business Manager.
- Return to Business Manager and hit “Verify”.
PHASE 3 – Assign partners and add assets
Last but not least, you want to go back to Facebook Business Manager and connect your business assets with your verified domain.
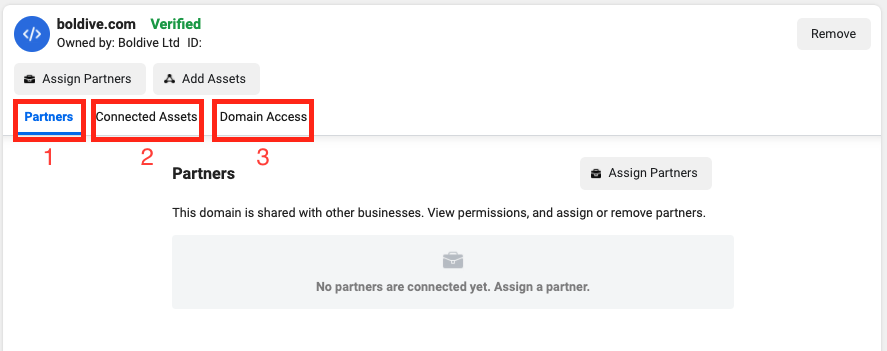
- To assign partners (i.e. advertising agency, media partner), go to the “Partners” tab or click the button “Assign Partners” above it. Now enter your partner’s Facebook Business Manager ID. They will then receive an email to confirm your invitation.
- Use the “Connected Assets” tab or click on the button “Add Assets” to connect your Facebook page(s) to your verified domain.
Note: Your Facebook page won’t get automatically connected with your Business Manager Account. - Go to “Domain Access” to manage ad link editing. Anyone with a Facebook Page can create an ad that includes a link to your domain. By default, the person creating an ad can edit the descriptive content associated with the link, such as the title or image (Facebook calls it link editing). But you, as the verified owner of the domain can choose to set limits to the way people link to your domain from their Facebook ads.
Over to you
There you have it. I hope you found this short and practical Facebook domain verification guide handy.
If you have any questions or got stuck at any point, please feel free to let me know in the comments below.
